Followers

Showing posts with label poison bottle. Show all posts

Monday, May 18, 2015

May I have a quick word part too at Haunted design House

Time for part 2 oft the "May I have a quick word "challenge  at hdh,  soooo a project made in less than a day or use a word.


I went for the quick project, took about an hour and a half (thinking time not counted lol)


This is a wooden tag, painted, stamped and added a little poison bottle.

the tag is gessoed and  painted using Americana acrylics, stamps are Lost Coast Designs and the Drink me label is a part of an I Brake for Stamps stamp designed by Rick St.dennis. The bottle has textured glas on it and is gessoed and painted using Dazzling Metallics.

Check out the rest of the minions inspiration here, and enter the challenge here


,
Deco Art products used :
Americana Gesso, Americana acrylics in the colours : Spa Blue, Mocha and Drift wood. Dazzling Metallics in Moss Pearl and Teal. Traditions acrylic in Carbon Black and Texture Glass

Monday, October 20, 2014

macabre monday at HDH and day 20 of the 31 days of Halloween on AC

A double purpose post today, sorry, life got in the way big time so I had to combine a bit, hope you don't mind.

So for the new challenge at Haunted Design House  and my turn on the 31 days posts on Airless Chambers.....

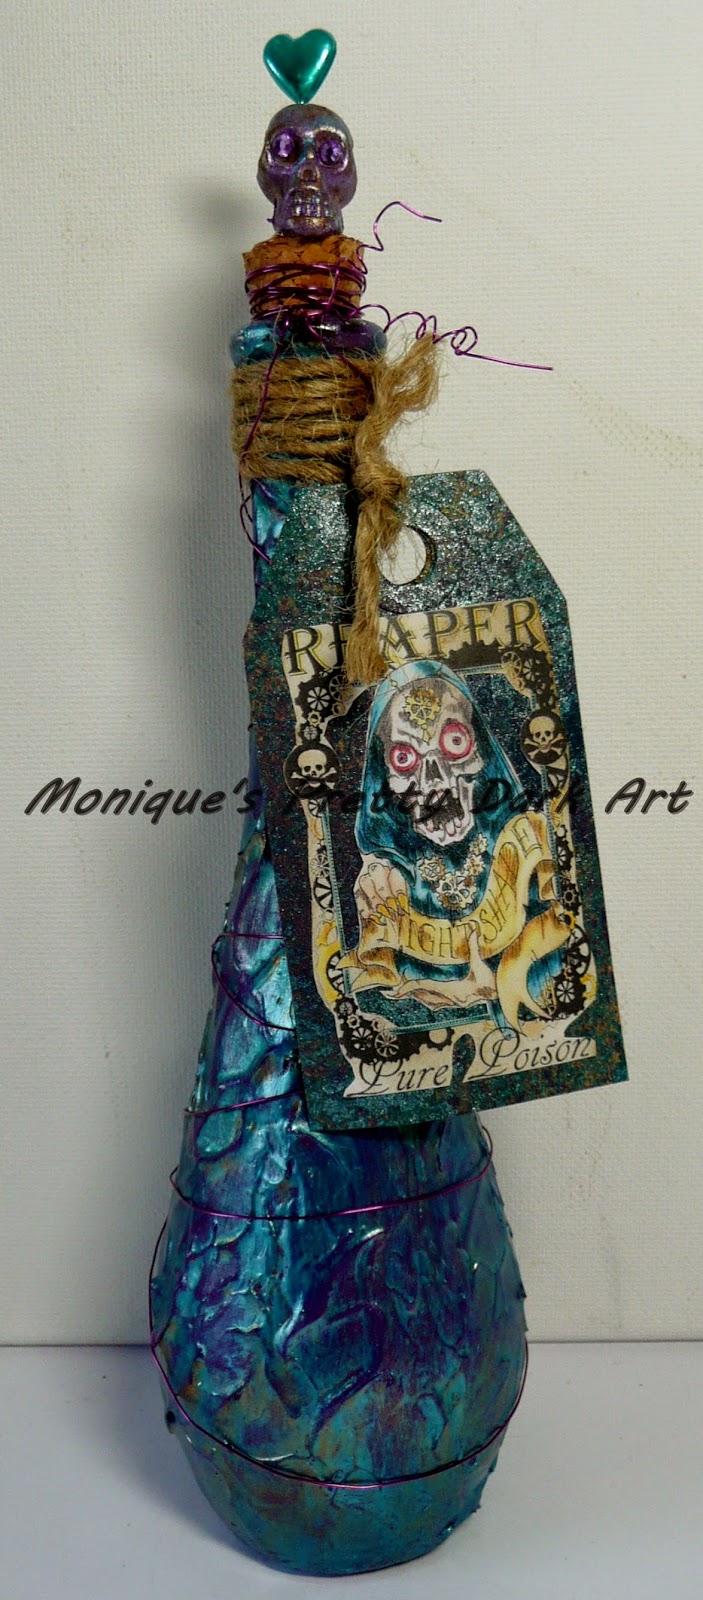
 I made a poison bottle for you, what's Halloween without poison?? Yah see, you absolutely need one......

so first a pic and than the receipe..


Ingredients:
A bottle (just a glass bottle any bottle will do)
Rick St. dennis digi called bottle lables (duh!!!) it's a set of 3 (1 bottle is never enough)

Deco Art products used
Dazzling Metallic paint in colour Teal
Elegant finish metallic paint in Medieval Gold
Metallic Lustres  in Brilliant Turquoise, Majestic Purple and Iced Espesso
Deco Art Media misters in purple and shimmer mister in turquoise
Wire, a plastic skull bead, a heart shaped hat pin, a kraft tag and some rope,  rhinestones


How to make a poison bottle for dummies:

1)  Remove cork (make sure it doesn't get lost) and clean the bottle (I use rubbing alcohol, don't drink the stuff, if you do you will not be able to complete this project).

2) Open the jar of Texture glass and stir, the stuff is white, but the cool thing is, it dries clear.

3) Use a palette knife to apply the texture glass on the bottle, dabb the palette knife on the covered bottle to get the texture, it's easy you can do it, you'll see.

4) Let dry (I just let it stay over night to make sure the thicker parts of the texture glass are dry too, and no,.... don't touch the stuff untill the next day, cuz you'll get finger prints in the texture. You DON'T want your finger prints on a poison bottle, savvy?)


While bottle is drying
Color the digi from the bottle lable set, I used Reaper Pure Poison (why go for less if you can have the pure stuff), 
Use the misters to give the tag a cool look :-) cut out the dig and glue it on the label

Add the metallic lustres (all 3 colors) on the plastic skull (rub with cloth to get more shine in between layers) 
Glue the rhinestones in the skull's eyes and let dry, done for today go do something else f.i. colour a digi, enter the DT call...whatever.....


next day :-)

5) Paint the bottle using the multisurface acrylic in eggplant, and let dry.

6) Paint a layer of Dazzling metallic paint in teal (shake bottle first, the paint bottle, not the one you are altering, well you can shake that too if you want, but it doesn't affect the end result, unless you drop it, in which case you clean up the shards (carefull sharp and you don;t want your DNA all over the place), find a new bottle and start over again), 
 Whipe off on randome spots till you get the result as in pic above. Let dry.

7) Shake the jar of elegant finish in medieval gold (open it)  and use a fan brush to apply a thin layer see pic.

Take a piece of rope and wrap it around the neck of the bottle, and attach the tag to the rope.
put the cork in the bottle 

Put the hat pin through the hole in the skull bead and press it into the cork (the hat pin not the skull)

Take the wire and wrap it around the cork and the bottle end next to the cork and make a nice curl in the wire.

Done, easy peasy, now for the poison.......there are several options, it just depends on what (who) you will be using it on, I suggest to google for the right receipe, it's out there somewhere, I'm sure

hope to see you all again tomorrow enjoy the hop


can;t wait to see your entries in the challenge at HDH

I will enter the following challenges


Wednesday, October 30, 2013

31 days of Halloween day 30

Welcome to day 30 of the 31 days of Halloween organized by Smeared and Smudged,
blogroll is in the side bar.
I am also a Cryptkeeper in the Halloween countdown 2013, for the complete list of 192 Cryptkeepers joining the countdown to Halloween, see link here


Today a Poison Bottle, only a small one, you don't need much of this stuff :-)

The bottle is painted from the inside using Deco Arts Dazzling Metallics Shimmering Silver, Americana acrylic Antique teal and lamp black and some matte varnish.

 
and another AJ page, background again a Gelli print using Americana acrylics, Red alert, Calypso blue, True blue, Sea breeze, tomato red.
Also used a Deco Art stencil called safari.
 
The images used are Rick St.dennis digi's "basket of skulls"  and "Amulet" one of the cool devils from Rick's Zibbet. I have coloured some ot the devils before but none in green yet, so this one is green :-), (radioactive green to be precise)
 
The senti is from the internet, but I can hear this green guy say it LOL.
I used a stencil for the letters


one day to go, see you tomorrow for day 31


Friday, October 4, 2013

31 days of halloween day 4

This is day 4 of 31 days of Halloween (for details click linkie)  organized by Smeared and Smudged. Blogroll in the sidebar

And I am also a Cryptkeeper in the countdown to Halloween, see the list of the other 192 participants here

Today is Smeared Ink day and that will give you an extra chance to win the prize if you use a Smeared Ink stamp on your project.

here is my day 4 project a poison bottle

lots of pics comming

the bottle was brown glass, and I wanted to age it a bit
 
mix it, poor in the bottle and twirl it till the whole bottle is covered on the inside, this needs time to dry and you will have to turn the bottle a few times to keep the paint where you want it (gravity sucks, makes paint drip down)
I had prepared this part, the rest I did today and that was challenging.
Paint and glue needed drying time and needed to take pics in daylight
 
The skull is a Rick St. Dennis image boneyard Skull
 

The label is a Tim Holtz embossing folder. The paper  used is black cardstock, hard to believe when you see it now hey??
 
the magic ingrediënts are the Metallic Lustres, i used Gold Rush, Copper Kettle,  and Black Shimmer.
It's real easy to work with. I used a make up sponge and started to add the copper kettle first. It will get more shine if you use a cloth to rub it. then added the Gold Rush and Black Shimmer, just random till I liked the result.

 
Yes that is a doll head I used as a stopper.  I be headed a little baby doll, and poked some holes in the head for the horns . The horns are Lego (from a viking helmet, ssshhh don't tell my son)
the head the horns and the cork are painted with a layers of Deco Art Dazzling Metallics colour copper and added some Americana Antique teal .

the heart was lustred and the skull painted same as doll head

the Plague is a smeared ink digi, coloured using distress ink (rusty hinge, walnut stain and peacock)


This skull is a Rick St. Dennis image boneyard Skull coloured with distress ink


that's all folks, see you tomorrow for day 5
 
 
I will enter this bottle in the following challenges