
blogroll is in the side bar .
I am also a Cryptkeeper in the Halloween countdown 2013, for the complete list of 192 Cryptkeepers joining the countdown to Halloween, see link here
yay still there, here is my project

the card is made out of an cardboard box, used the Tim Holz Vintage Cabinet Card Die to cut 2 cards, and cut one pies in half.
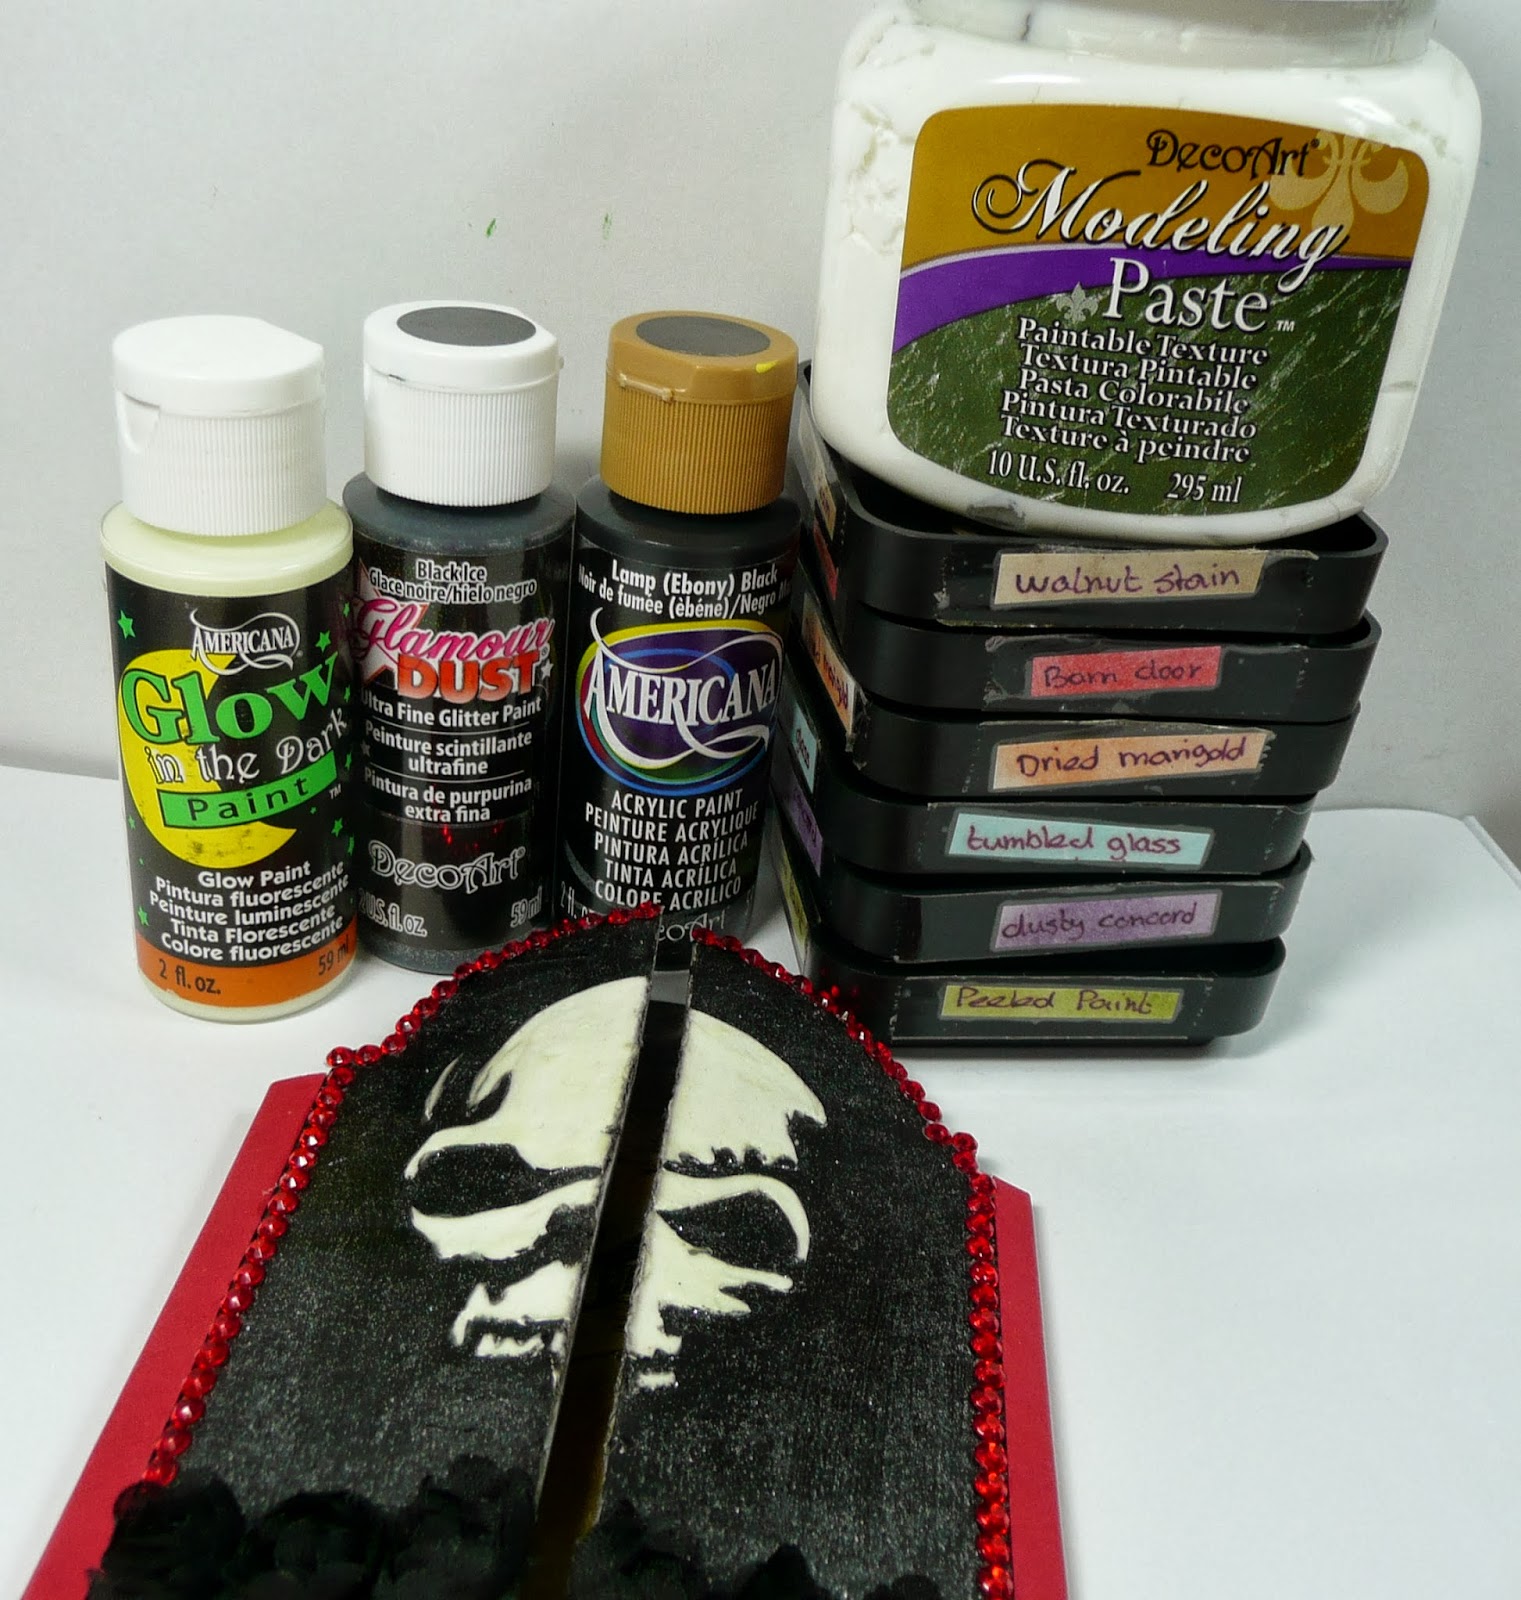
then painted with Americana Lamp Black acrylic paint, the skull was painted using glow in the dark paint. Then added a layer of Glamour Dust glitter paint black Ice around the skull

the inside has some stamping on it, I used white card and Archival Jet black ink.
The stamps are all from de Stempelwinkel
the sky and rest of the background is made using distress ink and make up sponge

and this is what the skull looks like in the dark, cool huh?

products used
I will enter this in the following challenge
Next is an AJ Page using a Rick St. Dennis image called the Reaper


here is how I made it,
first colour the digi Reaper, I used 3 colours green (Caran d'ache luminace, Light Malachite green, Beryl green and Malachite green, also added some Purplish red)
first I use the Light Malachite green, colouring very light
.jpeg)
make the shadows and some pieces of the cloak darker
.jpeg)
used the beryl green on the darker pieces of the cloak
.jpeg)
added the malchite green on the shades
and blend using paper stumpa and odourless white spirit
.jpeg)
The pieces of the Reaper and the cloak that are closer to you should be lighter than the pieces that are furter away. Also look where the light comes from for the lighter parts, Rick allready did the shadows for you so you can see where the light comes from.
.jpeg)
finishing touches,
look careful and make some pieces darker and lighter, create depth doing so..jpeg)
I added some Purplish Red just the blue/green was a bit dull
.jpeg)
coloured the rest of the image
.jpeg)
cut the reaper out
then the backgound (pic's are taken using a daylight lamp, the colouring step by step pics are from I pod and these are real camera, that's why there is a difference in the colours).
the background was a gelli plate print, just a simple one using yellow orange and red Americana Acrylic paints, brayering it on the Gelli plate mixes the colours and I liked the way it looked, so didn't add anything.
glue the reaper to the page

trace the reaper using a black pencil, it makes the reaper stand out more

find a quote you like on the internet and search a font you like. Write it on a piece of paper, just try to copy the font as good as you can, while writing you will start to change it to "your handwriting', it sorta happens. Writing the tekst also helps to get it right on the page whithout spelling errors

use a ruler and a pencil to draw lines, these a guide lines for the size of the letters, you want them all to be the same size (more or less LOL)

of course you can write the tekst in pencil first, but I never do, just start writing
I used a paint marker with a small nib, that works best on arcylic paint

I never measure where to put the tekst make it fit, I just write the text and make it look like the font I chose

when the text is on the page you can erase the pencil guidelines, use a kneadable eraser that works best.

and the finished piece, sorry for the glare, that happens when you use daylight lamp
here the products used

hope this was a bit helpful
see you for day 10
Nice work, both of them - I love especially the wonderful scene within the cabinet card! Thanks for the detailed tutorial, too!
ReplyDeletehugs serafeena
Fabulous card and so cool with the glow in the dark effect! =) Great scene inside too!
ReplyDeleteWonderful coloring of the reaper and great page! =)
Hugs, Elenor
WOW, Monique! Your projects are immense! Fab card. Love the front and the cool scene you've created inside with all those great stamps inside. And thanks so much for the fabulous tut. I'm always in awe of your AJ pages. xxD
ReplyDeleteFirst card is sooo glowingly awesome! Great painted skull and love the glam around it. I just love looking at all the stamps you fit in and they all make up such a wonderful scene.
ReplyDeleteYou make the page making look very easy. Just a little here and a little there...but you have a super eye for shading and love those backgrounds. TY so much for the step by step tutorial. Will have to try it soon!
Thanks Matney. But most if the shading is already been done by Rick so it's not that hard. Just try you will see.
DeleteVery cool post. Thank for so many deets and walking us through it.
ReplyDeleteWow. I love it. So talented, I am jealous!
ReplyDeleteLove these projects. Very creepy cool. I agree with Joe, you are so very talented.
ReplyDeleteLove the firey orange background and the glow in the dark project0you are rockin the DECO ART
ReplyDeleteOMG, I love the glow in the dark. It's amazing how well the photo of the glow in the dark skull turned out. Awesome project and thanks for the details on your projects.
ReplyDeleteUH-MAY-ZING post today Mo! Your tri-fold card is so spooktacular, love the scene inside and the glow in the dark skull is divine! Fab colouring and handwriting tut on the RSD project! So gorgeous!
ReplyDeleteThat's a very comprehensive tutorial - loved the parts about the lettering! Your trifold is spectacular too!!
ReplyDeleteOMG...outstanding work. Love the scene you created with all the rubber inside the card. Great shaped card. Thanks for sharing how you achieved such rich color and shadows with RSD "The Reaper". You have mad coloring skills!
ReplyDeleteohhh love the cabinet card...I just got that die and need to use it! The skull is amazing..and the Grim REaper is stunning!
ReplyDeleteVery cool card, love the glow in the dark skull. Amazing journal page, thanks for sharing your tips and techniques!
ReplyDeleteWow!! Love the glow in the dark skull!!! and fab tutorial on the writing, very useful! thank you!!! mo x
ReplyDeleteYes, it was helpful. Thank you the step-by-step with pictures on coloring. Love your card! And that is more then 'some stamping' on the inside. Marvelous job!!!!!!
ReplyDeleteI love to see the steps you've done when coloring. You always use such great colors together that are often unexpected. Always an inspiration!
ReplyDeleteI agree with Alison, thank you so much for sharing your steps!! Great project
ReplyDeleteWOW... amazing Reaper card is really great.... LOVE the Vintage Cabinet Card with the glow in the dark skull.... AWESOME PROJECTS!!!!
ReplyDelete