Followers

Wednesday, October 2, 2013

31 days of halloween day 2 and a GDT

This is day 2 of31 days of Halloween (for details click linkie)  organized by Smeared and Smudged. Blogroll in the sidebar

And I am also a Cryptkeeper in the countdown to Halloween, see the list of the other 192 participants here

For this post I will show you the AJ page that is also the GDT piece for the Crafters Cafe, Rick St.Dennis is sponsoring this challenge. check it our there are RSD digi's to win.

The image used is Withcie Burlesque a Rick St.Dennis digi, the back ground is again a Gelli print using Deco Art Americana Acrylic paint (Hauser Light green, Tomato red,  orange, lemon yelllow, purple cow)


have fun hopping and leaving some bloggie love is much appreciated
 
see you tomorrow for day 3
 

Tuesday, October 1, 2013

31 days of halloween day 1

Yay!!!!, my favourite time of year, yes even better than Christmas LOL. The 31 days of Halloween (for details click linkie)  organized by Smeared and Smudged starts today.

Welcome to day 1 of the craziest bloghop I have ever seen (also the best one),  this is my 3rd year so I know how it works..........make project, post on time, hop and next day start over again. (O the blogroll is in my side bar and it's huge )

And I am also a Cryptkeeper in the countdown to Halloween, see the list of the other 192 participants here

This year I am prepared and have some projects ready and waiting, plan was to Art Journal my way through, but also wanted to do some stamping so I've got 2 projects for you today (no that's not standard for all days LOL)
Here my AJ page using a Rick St. Dennis digi called Autumn Nap , the background is a gelli print and the paints used are  Deco Art Americana acrylics in Red, Orange and Burnt Sienna. The letter are painted using  Deco Art Glamour Dust glitter paint , black Ice. The leaves are a foam stamp, stamped with Dazzling Metallics in glorious gold.
The bats are from a Deco Art stencil called "spooky".


and cause this mouse might be a bit too cute for some of you I thought to add another, a bit more spooky project.
 
As a bonus project I made a tag. I always handcut my tags that way I can make them as big as I need. I wanted to use Vanna Vampire, a RSD image in rubber, available at I Brake for Stamps and for us  Dutchies also available at Koffie Kaartje (contact shop to order, they are not visible in shop yet).
 
 Anyway I cut some black card to the size I wanted and embossed it using a cuttlebug embossing folder. Then I used Deco Art Metallic Lustres to create the matal look.  The colours used are black shimmer and silver spark. It's real easy to work with and the result is sooo awesome. First ad the black shimmer, I used a make up sponge for that, and carefully add the silver spark to the raised parts. Super easy....


O that's it for today, have fun hopping and leave some love along the way, see you tomorrow and remember the blogroll is in the sidebar


Wednesday, September 25, 2013

Design Team Trowdown challenge 9

The challenge theme "Metal Menia" was picked by the winners of challenge 8 Delicious Doodles.

The Design Team Throwdown challenge is organized by Smeared and Smudged forum, and it was moved to a blog last challenge, you can find it here.

The  Airless Chaimbers team for this challenge is Rick, Julia and me (Mo).

My project wasn't planned for the throwdown, some of you might have seen a preview on facebook. It was suppose to be my day 5 for the 31 days of Halloween, and also my dt project for the newsletter freebie. But life got in the way of a fellow teamie and suddenly I was in the throwdown.
Yep guys I used the freebie image that will be in the Rick St. Dennis October newsletter,  It was supposed to be a secret but I spoiled that for all of you. The good part is it gives you the oppotunity  to sign up (here) if you allready haven't done so, cause this is a must have image.

The other goodies I used are Deco Art Americana Acrylic paint (lamp black and  traditional burnt umber) and Dazzling Metallic paint : emperors
gold. Glazing medium and Weathered wood crackle medium. Metallic Lustres in black shimmer and Gold Rush.


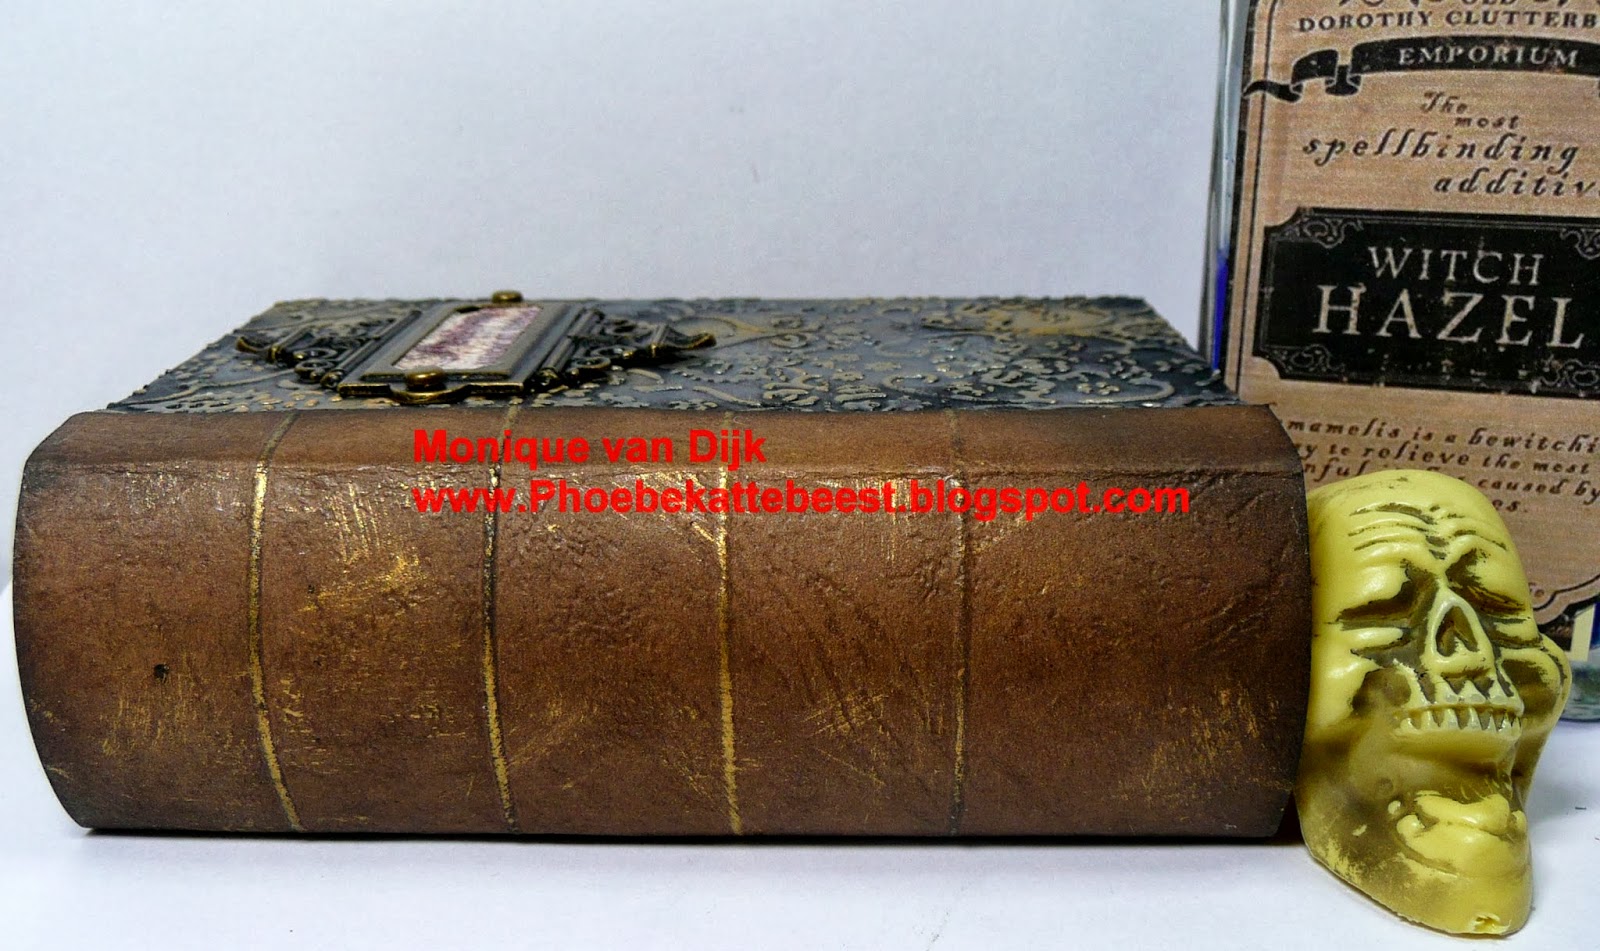
Ok here it is my book of Potions and Magical Spells :


 The book was a wooden book box the outside is covered with black cardstock, first embossed and then added the metallic lustres (the coolest stuff ever!!), the inside of the box was painted,first the emperors gold thenthe weatheredwood and the top layer lamp black.

The digi is a Rick St. Dennis image (newsletter, don't forget!) the bottles are filled with glitter glue, the skull and spider are also coverd with the metallic lustres  (that stuff can be used on anything  the spider web has some on it too.
The little pumpkin was in my prize package for being Master of the Macabre (
August 2013) from Haunted Design House (thanks guys loved all the goodies you send me)


and a pic of the materials used
 
 
I will enter this in the following challenges


Sunday, September 22, 2013

a bit scary and a cute monster page

Ok this is a bit scary even for me (yes I hear you guys thinking, huh?? what can scare you??, you're on the dark side. Trust me, I do get scared sometimes LOL)

I will get you the pics first


I agree, these aren't very scary pics.......but..........the idea that I will be starting teaching classes at Koffie Kaartje is a little bit scary in a good way LOL.
First class will be all about making these tags, that will be in November, you can sign up at the shop.
 
What I used to make them:
some flowers and charms
Marianne Design clear stamps
archival jet black ink
 
Next one is another Art Journaling page, I used a Rick St.Dennis digi called  Goblin Gus my Gelli plate and Deco Art Americana Acrylic paints Calypso blue, Sour Apple and some left overs from a previous print. Quote came from the net.
The markers used are Edding 8400 cd/dcd and blue ray marker for the zentangle frame and the lettering is Edding 780 paint marker. Image is coloured using Caran d'ache luminance 6901 pencels


O and some cool news  for Dutch RSD Rubber fans (and maybe also for our neighbour countries)about the RSD Rubber stamps that are available at I Brake for Stamps, you can now also order them at Koffie Kaartje, they are not in the online shop yet but you can contact the store to order, saves postage.
 
 
I will enter the tags in the following challenges
 
 http://simplysteampunkchallenges.blogspot.nl/2013/09/sept-6th-challenge.html  i hope layers of paint will count, there are lot's of them on the tags
 
 
I will enter the AJ page into the following challenges


http://artisticinspirationschallenges.blogspot.co.uk/ challenge 59 anything goes or frame it; the AJ page's got a zentangled frame


Monday, September 16, 2013

Glass painting how to

I  bought a glass plate at the thrift store, one you can put candles on, it was just plain glass , perfect for trying out some glass painting.

I will show you how to in a minute, first a pic of the finished piece


Supply list
 
paintbrushes
white vinegar
old newwpaper
scotch tape
glass plate
pattern (see below)
 
 
This pattern is provided by Rick St.Dennis MFA, (thanks Rick for drawing this for me)  you will need the black and white version, the coloured version is for colour reference

 
This technique is called "REVERSE GLASS PAINTING" you paint the top layers first and then work down to the background. Since you are painting on the backside of the glass the finish is very slick and professional looking especially with DECO ART glass painting products.
Rick designed this project to use DECO ART GLOSS ENAMELS-Gloss Enamels are opaque and can be home oven baked for a durable dishwasher safe finish-they can also be blended for a wide variety of colours.
I love the sparkle and look of the Deco Art glamour dust glitter paints-so, I changed the painting pattern to suit my supplies.
Rick always encourages painters to change and adapt his patterns to suit their creative feelings-for instance this pattern could be done in AUTUMN colours-drop the Halloween senti and add an acorn border-you could even edit out the face on the pumpkin.
 
HOW TO
 
Wash the glass plate in hot water and rinse it with white vinegar, let dry completly.
 
Place it face down on an old newspaper and mist the back with the Americana Matte Spray, just a light even coat, let dry for 24 hours (yep you need patience for this one LOL). I did a second layer of spray just to be sure I didn't miss a spot (and again let dry 24 hours)
Than we can start, put the plate face up  on your work space
 
Print the black and white pattern (change it to the size you need, I enlarged the pattern on a copymachine
 
Tape the pattern FACE DOWN on the FRONT of the plate, to make it easier to tape it(cause of the curves in the plate) I first cut the middle part out and cut all sides too. 


when you taped every piece of the patteren in place it should look like this, check that every piece is place correctly, hard to see cause of the mirrored writing,

You will be painting on the back of the plate, where the Americana Matte Spray is
 
take the neon  yellow glitter paint, shake well and paint the swirls in the stars and the yellow highlights at the eyes, nose and mouth, let paint dry
 
Use the Glass paint marker trace all out lines and writing ( it says Happy Haunting) on the pattern, let dry

 
when finished it looks like this, see pic below
 
you will need to add several layers ( let dry in between layers) of glitter paint to get the best result

 when the yellow swirls  and highlights, are the way you like and have dried you can start painting the stars orange, and add the green to the stem. and when the orange of the stars is dry, you can start painting the edges green

add the purple round the pumpkin


Mix the yellow and orange to get a lighter orange to use for the highlights in the pumpkin, see pic. again you will need more layers to get it right. Let dry in between layers.
 When you turn the glass plate face up, (make sure paint is dry before you do this) it should look like this (check if you use the coloured pattern as reference if you paint the highlights in the right place)
turn it face down again and paint the rest of the pumpkin orange, this is what the finished piece looks like when all layers paint are on, let dry and
use the Americana Matte Spray to seal the back, let dry 24 hours
 
and done.
 
Here some more pics of the finished piece
 
and a bit closer to see the high lights and the glitter
 
 
more glitter


and some more glitter
 
 
 and the final pic.


I really like how it turned out, of course you can use Deco Art glass paint, but the Glitter paints works fine on glass , I really love the glitter and neon for Halloween.
 
Happy Haunting 
 
 
I will enter this in the following challenges