
I always have a bit of trouble when someone tells me what I HAVE to use, (authority problem or just being Dutch, I dunno, but I always get a bit rebellious in challenges like this, so I just had to add an extra colour: Orange (or a bit rusty colour anyway, would count for the metal too I figured) but I tried and only cheated a little bit
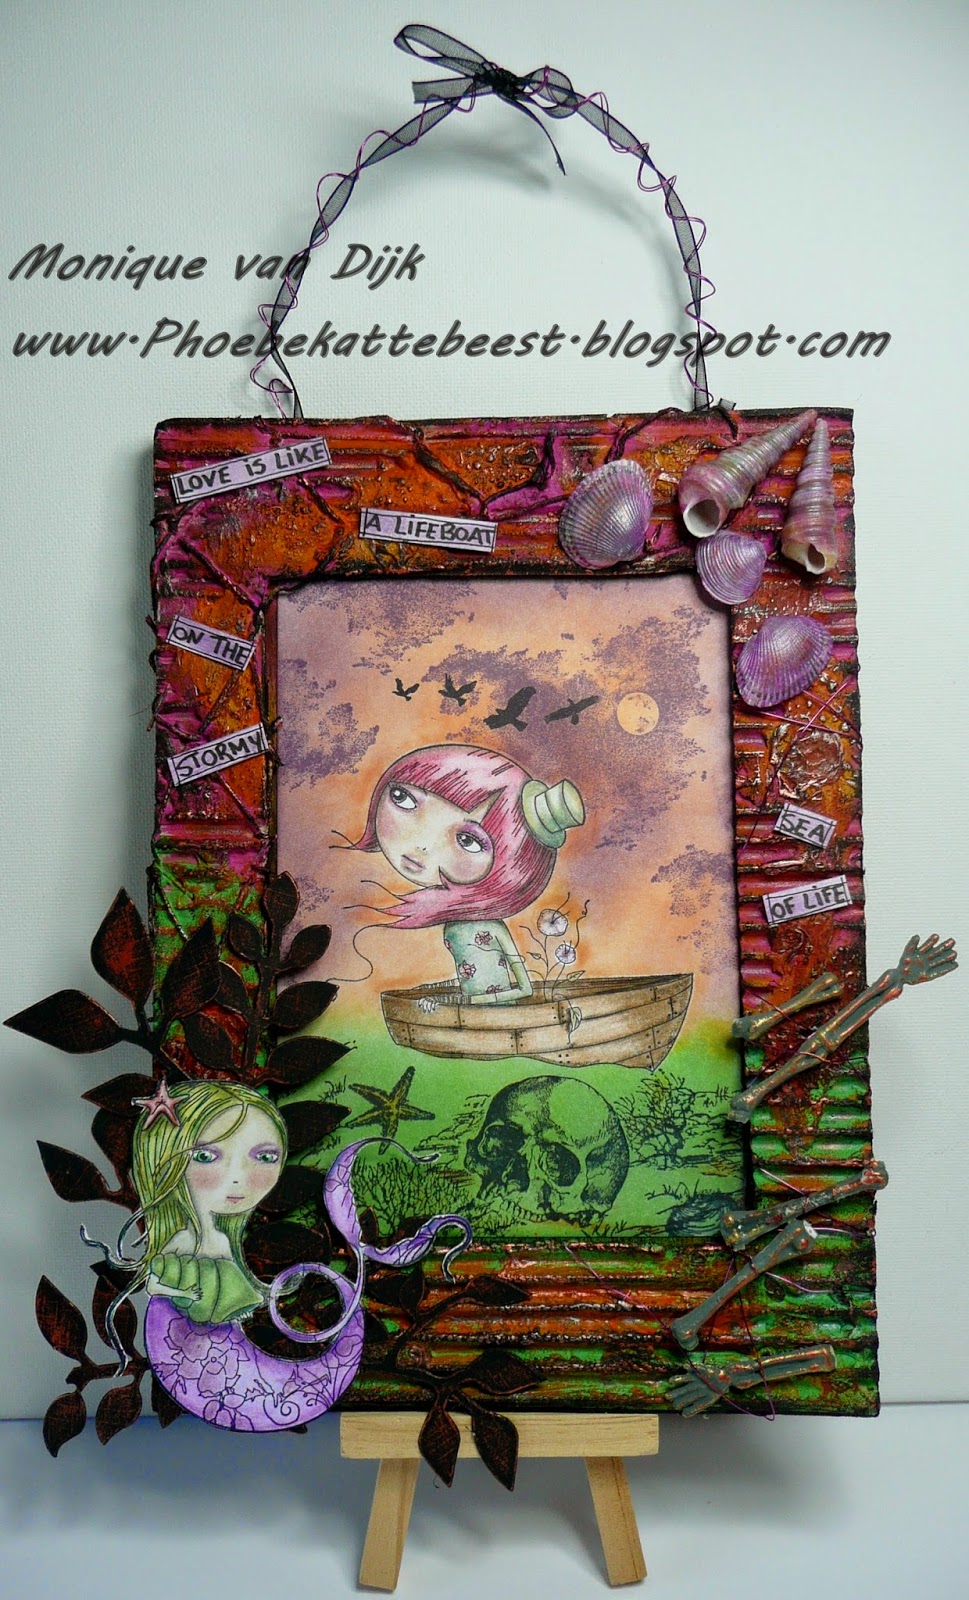
I made a wall hanging this time, will tell you what I did below this pic

Deco Art Americana acylics, colours : Vivid Violet, Bright Green, Traditional Burnt Sienna, True Ochre, Lamp Black, Spice Pumpkin.
Deco Art Metallic Lustre : Copper Kettle
Tim Holtz Distress Inks: spiced marmelade, dusty corduroy, mustard seed, broken china.
Tim Holz Die to make the flourish, plasic skelly, some wire, a piece of net,staples, shells
card board (from a box), black and white cardstock, Archival Jet Black ink. Glue, black marker,foam tape, coloured pencils and a heat gun.
I used the following stamps:
The Mermaid and the girl in the boat both are Mirabelle clear stamps by Santoro
The star fish is viva decor
The Skull, clouds and the "coral" in the sea are all from de Stempelwinkel

Start by cutting 2 pieces of out of a carboard box, they need to be the same size. Figure out how big the image that goes in the fram will be and cut that out of 1 of the pieces card board to create a frame
remove the top layer from the frame on some spaces, ataache a piece of net using staples.
now the fun part starts
Paint the frame in the frame using purple and green, let dry add the true ochre burned sienna and spice punmpkin in layers. Use your heat gun to blister and boil the pain (LOL yep gp nuts wth the heat gun). that makes the rusty look, just add layers of the 3 colours and burn and add untill it looks rusty
then use a bit black on the edges and to make the colours less bright, use a sponge and wipe a bit black over the raised parts of the frame, as final touch add some copper kettle metallic lustre
stamp the images, (you need to do some masking to get this result), use distress to colour background and pencils (or markers) to colour the images.
Glue the image on the back piece of the card, add foam tape to the frame, make holes in the back piece for adding the wire, to hang the piece. and add some wire on the frame by wrapping it around the frame.


attache the stamped piece and the frame to the back piece of cardboard
Paint the shells purple, die cut the flourishes and add some metallic lustre, hand rite the senti on whit card and use distress ink to make it purple, and cut out the words. add everything to the frame and done


I will enter the following challenges
http://www.onesweetchallenge.blogspot.nl/2014/06/junes-challenge.html#comment-form
http://leftofcenterchallenges.blogspot.ca/2014/05/challenge-32-girly-with-sassy-studio.html
http://a-step-in-the-darkness.blogspot.co.uk/2014/05/challenge-2.html
Monique, this is simply stunning!! Beautiful piece of work, just gorgeous!!
ReplyDeletePhenomenal! There are so many cool details to discover. Love the blistered paint...gotta try that. The texture of this piece is delightful with the wire, the corrugated cardboard, and the bubbled paint. Love the way you combined and used the images. Oh heck, I love the whole thing...lol. Well done!
ReplyDeleteWOW Mo! This is beyond fabulous! Love all the techniques you've achieved with your brillinat use of paints and inks and the masking is wonderful. Love, love, LOVE it! xxD
ReplyDeleteLove this project and your details explain your process so well. Thanks for joining us at A Step In The Dark - good luck x
ReplyDeleteMonique this is utterly gorgeous hun, I love all the colours, images and your detail, and a fabulous step by step too...thank you for sharing with us at A Step in the Dark, best of luck xxx
ReplyDeleteHi, A lovely project, love the image and the gorgeous colours. Thank you for joining A Step In The Dark this fortnight. Good luck and we hope to see you again soon.
ReplyDeleteHugs Erin DT & Co Owner x
This is fabulous! I love it! Thanks for joining in our Girlie challenge at Left of Center! I hope you will join us At the Movies this fortnight! Mo dt coordinator xxx
ReplyDeleteSo many fantastic elements to this project. Love all of it. Thanks for joining us at One Sweet Challenge
ReplyDelete